
For some crazy reason I thought I could get away with building RageDB without a UI. I was using the “Advanced REST Client” to test functionality, it has served me well for the last few months, but it’s time we added a few coats of paint to our database server and let users interact with the graph visually instead of by squinting at JSON outputs. As a primarily back-end dev, building a front end is a scary proposition. I am barely getting the hang of C++ (yeah right) and now I’m going to have to write a bunch of Javascript and Node and React… no.
No, thank you. We’re going to bolt-on our UI right on top of Seastar and leverage the same http server that we’ve been using to build the HTTP API. We can do that by making our site static and leveraging the directory_handler to just serve files. We’ll start off by creating a “public” directory as our UI file root and give it a blank url to capture any requests that were not handled already.
server->set_routes([](seastar::routes &r) {
  r.add(operation_type::GET, url("").remainder("path"),
    new directory_handler("./public/"));
}).get();
I created an “index.html” in the public folder that said just said “Hello World” and when I started the server I could see it. I’m not going to show you because that’s pretty damn boring, we need to jazz it up a whole bunch. Wanting to stay away from Javascript as much as possible I decided to once again use Bulma – The modern CSS framework that just works.

On their home page they say: No CSS knowledge required, No Javascript Required. Which is perfect! So we’ll copy the css files, add them out our public folder and we can have a pretty website just like our home page. The big thing we’re going to need is a code editor to write out the Lua code for our queries. I dug around and found Ace:

We are all about high performance here, so we’ll copy those files into our public folder and use it for our code editor. Besides the code editor, we will need a few sections that are pretty standard for graph database UIs. An Inbox to let the users know about new stuff, a Schema to show them what database they are using and what types of nodes, relationships and properties have been created. We’ll need a way to keep track of the History of their queries, and a way to save some queries as Favorites. We also need to add a section for inline Documentation, some Recipes or Guides to help them get started, a section for Settings and a way to reach the Community we’re trying to build.
I needed some icons to represent those sections and luckily I ran into 3dicons so I won’t have to use the rather boring icon fonts.

Since most of us have very wide monitors, I’m going to go with a 4 column split. The first column is just the icons for the different sections. The second column will show the sections one at a time. The third column will have the code editor and the response in json. Finally the fourth column will display the result as a graph if possible. Not every result can be shown as a graph, so this window may be empty for some queries and that seems like a waste of screen real estate. Maybe we’ll come up with a good use for it later.
Once we put all these things together we get this mock-up:

That doesn’t look bad at all no? Of course, none of it works just yet, but we have some direction of what to build.
Let’s start off with the easiest thing, the Inbox. I will create a file “inbox.json” and host it on ragedb.com.
[
  {
    "title": "You got mail",
    "description": "Interesting news about RageDB will show up here."
 }
]
Then we’ll write up a bit of Javascript to pull from this url when it loads and display it. For first let’s go get the mail:
async function getMail() {
    let url = 'https://ragedb.com/inbox.json';
    try {
        let res = await fetch(url);
        return await res.json();
    } catch (error) {
        console.log(error);
    }
}
Then once we have the mail, we need to display it which seems pretty straight forward:
async function renderMail() {
    let messages = await getMail();
    let html = '';
    messages.forEach(message => {
        let htmlSegment = `<div class="icon-text">
                            <span class="icon has-text-info has-tooltip-arrow has-tooltip-right" data-tooltip="${message.description}">
                                <i class="fas fa-info-circle"></i>
                            </span>
                            <h2 class="subtitle">${message.title}</h2>
                            </div>`;

        html += htmlSegment;
    });

    let container = document.getElementById("inbox");
    container.innerHTML = html;
}
Now when I reload the page and click on the letter icon, I see this:
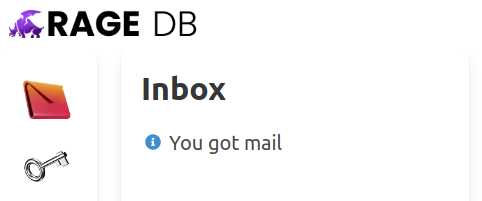
Looks like spam, but we can put more interesting things later on as RageDB progresses. I need a break from this javascript so we’ll do a super easy one. The community icon which is just links to where the community of the project will gather. We’ll start with a link to the blog post that started it all. I created an account on twitter for project announcements. We have the Slack channel (get an invite) and of course the github repo.

Now for the most important part. Being able to send queries and getting the output. We’ll add the real Ace code editor to our page, set the theme to “dracula”, get rid of the annoying print margin line and set the syntax highlighting to be Lua. We are going to tweak these in the future to learn RageDBs functions.
var editor = ace.edit("code");
editor.setTheme("ace/theme/dracula");
editor.setShowPrintMargin(false);

var LuaHighlightRules = ace.require("ace/mode/lua").Mode;
editor.session.setMode(new LuaHighlightRules());
Next is the Javascript to send the code and display it. We’ll get the value from the editor, send a POST request to /db/rage/lua, wait for the response and add the response to the page. Pretty straight forward:
async function sendscript() {
    let query = editor.getValue();

    let url = '/db/rage/lua';
    try {
        let res = await fetch(url, {
            method: 'POST',
            headers: {
                'Content-Type': 'text/plain'
            },
            body: query
        });
        let ele = document.getElementById('response');
        ele.innerHTML = await res.text();
    } catch (error) {
        console.log(error);
    }
}
Now we’ll wire our Rocket button to call it:
<button class="button" onclick="sendscript()">
  <span class="icon">
    <img src="/images/icons/rocket-dynamic-color.png"/>
  </span>
  <span>Run</span>
</button>
Let’s try it and see what we get:

Awesome. We still need to capture the query history and favorites, add the documentation and some recipes, as well as parse our results and visualize them. Front end work wears me out so we’ll tackle those things in a future blog post.
