
In our last post we started the front end of our Twitter Clone application and managed to register and login a user. Now we need to build the actual functionality of our application. We’re going to need a screen to display the timeline of the logged in user. A screen to display a single users posts, and a screen to display the followers of a user and the users being followed. All of these should fit within the same main template, so maybe we can start with that.
Once again, I’m going to spare you the HTML and CSS code, but I do want to point out a few things. Our template engine, Rocker, has the concept of a page that takes a “RockerBody” parameter as input. Our main template will take a page title, the logged in user and this RockerBody content as parameters, so it looks like this:
@import com.maxdemarzi.models.User

@args (String title, User user, RockerBody content)

<!DOCTYPE html>
<html lang="en">
<head>
    <meta charset="UTF-8">
    <title>Grittier @title</title>
At the top of our main template after the header is a navigation bar. Following the look of Twitter, it will look like this:
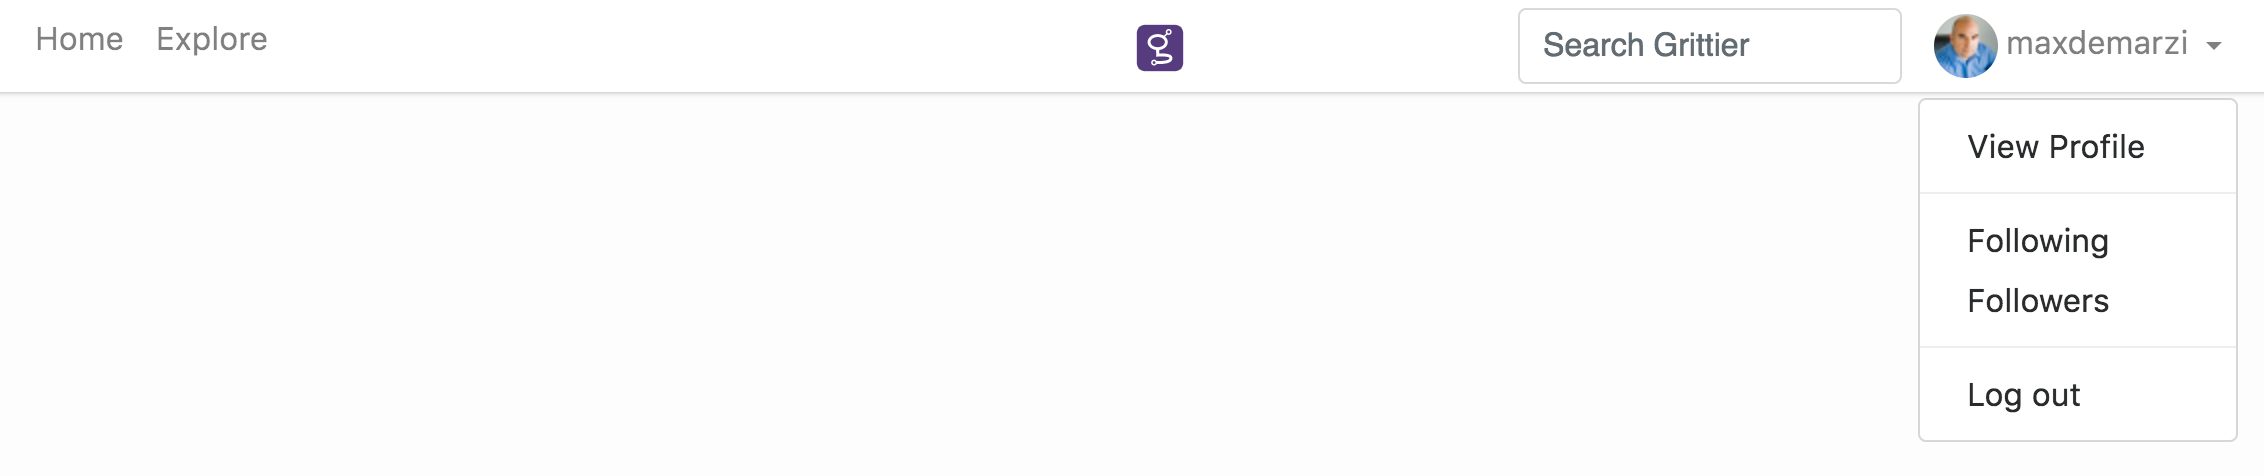
The only tricky part is the username and picture on the right hand side. Using Rocker we can add an @if statement that shows the user and their drop down links if it exists, or shows a register/login button if not logged in. I’m using gravatar with an md5 hash of the email address to get the picture and the css style “rounded-circle” to get that sweet round image.
@if (user != null) {
<li class="nav-item dropdown">
<a class="nav-link dropdown-toggle" href="http://example.com" id="navbarDropdownMenuLink" data-toggle="dropdown" aria-haspopup="true" aria-expanded="false">
<img src="https://www.gravatar.com/avatar/@user.getHash()?s=32&d=retro" class="rounded-circle" />
@user.getUsername()
</a>
<div class="dropdown-menu" aria-labelledby="navbarDropdownMenuLink">
<a class="dropdown-item" href="/user/@user.getUsername()">View Profile</a>
<div class="dropdown-divider"></div>
<a class="dropdown-item" href="/user/@user.getUsername()/following">Following</a>
<a class="dropdown-item" href="/user/@user.getUsername()/followers">Followers</a>
<div class="dropdown-divider"></div>
<a class="dropdown-item" href="/logout">Log out</a>
</div>
</li>
} else {
<li><a class="btn btn-primary" href="/login" role="button">Login</a></li>
<li> </li>
<li><a class="btn btn-secondary" href="/register" role="button">Register</a></li>
}
The following and followers links are built using the username of our user and the logout method comes from free from Pac4j. The template has a magic @content at the bottom of the page, where the other pages will fill in their stuff.
@content
<script...>
</body>
</html
We also need to create a few partials. One of them is showing the User in a little window and looks like:
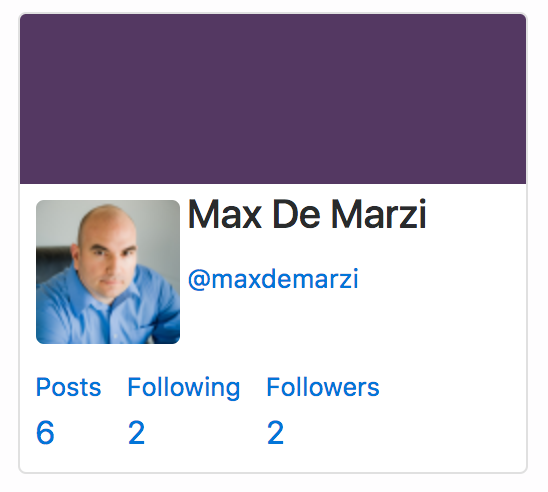
The whole code for it is pasted below. One funny thing is that in Rocket the “@” character is special so we have to escape it with a second “@” when displaying the username of our user “@@@user.getUsername()”.
@import com.maxdemarzi.models.User

@args (User user)

@if (user != null) {
<div class="card">
    <img class="card-img-top" src="/assets/img/card-top.png" height="85" alt="Card image cap">
    <div class="card-block p-1">
        <div class="d-flex flex-row">
            <div class="p-1"><img src="https://www.gravatar.com/avatar/@user.getHash()?s=72&d=retro" class="rounded" /></div>
            <div> <h5>@user.getName()</h5>
                <a href="/user/@user.getUsername()" style="font-size:small;">@@@user.getUsername()</a>
            </div>
        </div>
        <div class="d-flex flex-row">
            <div class="p-1"><span class="small"><a href="/user/@user.getUsername()">Posts</a></span>
                <br><a href="/user/@user.getUsername()">@user.getPosts()</a>
            </div>
            <div class="p-1"><span class="small"><a href="/user/@user.getUsername()/following">Following</a></span>
                <br><a href="/user/@user.getUsername()/following">@user.getFollowing()</a>
            </div>
            <div class="p-1"><span class="small"><a href="/user/@user.getUsername()/followers">Followers</a></span>
                <br><a href="/user/@user.getUsername()/followers">@user.getFollowers()</a>
            </div>
        </div>
    </div>
</div>
<br/>
}
Another partial is the “Trends” partial to let users know what is popular and trendy on Grittier. That looks really simple:
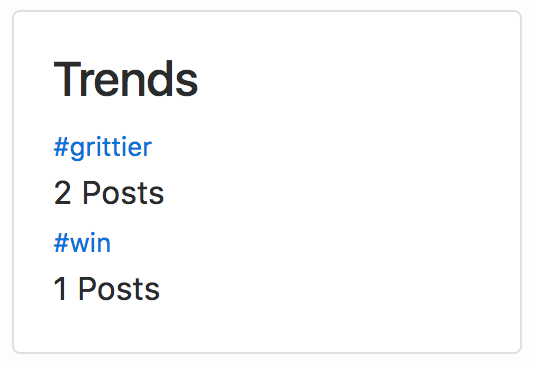
The partial itself is also pretty simple with just a link and count.
@import java.util.List
@import com.maxdemarzi.models.Tag

@args (List<Tag> trends)
<div class="card">
    <div class="card-block">
        <h4>Trends</h4>
        @for (it: trends) {
        <a href="/tag/@it.getName()" style="font-size:small;">#@it.getName()</a> <br>
        @it.getCount() Posts<br>
        }
    </div>
</div>
To use these partials, we will create a 3 column layout Home template and put them on the left side of the template.
<div class="container-fluid container pt-5">
        <div class="row">
            <div class="col-3">
                @views.partials._user.template(user)
                @views.partials._trends.template(trends)
            </div>
On the right hand side of the 3 column layout is where our “Who to follow” partial goes:
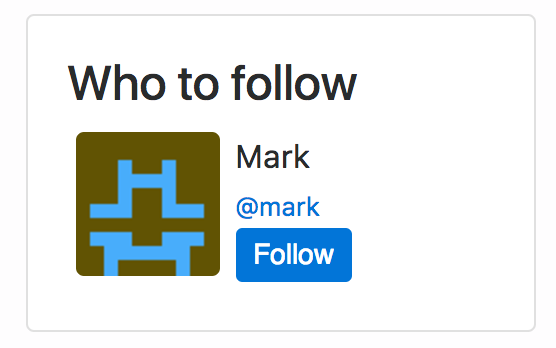
The code for the partial is pretty simple as well:
@import java.util.List
@import com.maxdemarzi.models.User

@args (List<User> recommendations)

<div class="card">
    <div class="card-block">
        <h4>Who to follow</h4>
        @for (it: recommendations) {
        <div class="d-flex flex-row">
            <div class="p-1">
                <img class="rounded" src="https://www.gravatar.com/avatar/@it.getHash()?s=72&d=retro"/>
            </div>
            <div class="p-1">
                @it.getName() <br>
                <a href="/user/@it.getUsername()" style="font-size:small;">@@@it.getUsername()</a><br>
                @if (it.getI_follow() != null) {
                    <form id="follow" action="/follow/@it.getUsername()" method="post">
                        <input type="submit" class="btn btn-primary btn-sm" value="Follow" />
                    </form>
                </div>
                }
        </div>
        }
    </div>
</div>
In our middle column we need to have our timeline. First a form for input of a new post, and then a list of the posts from the users timeline.
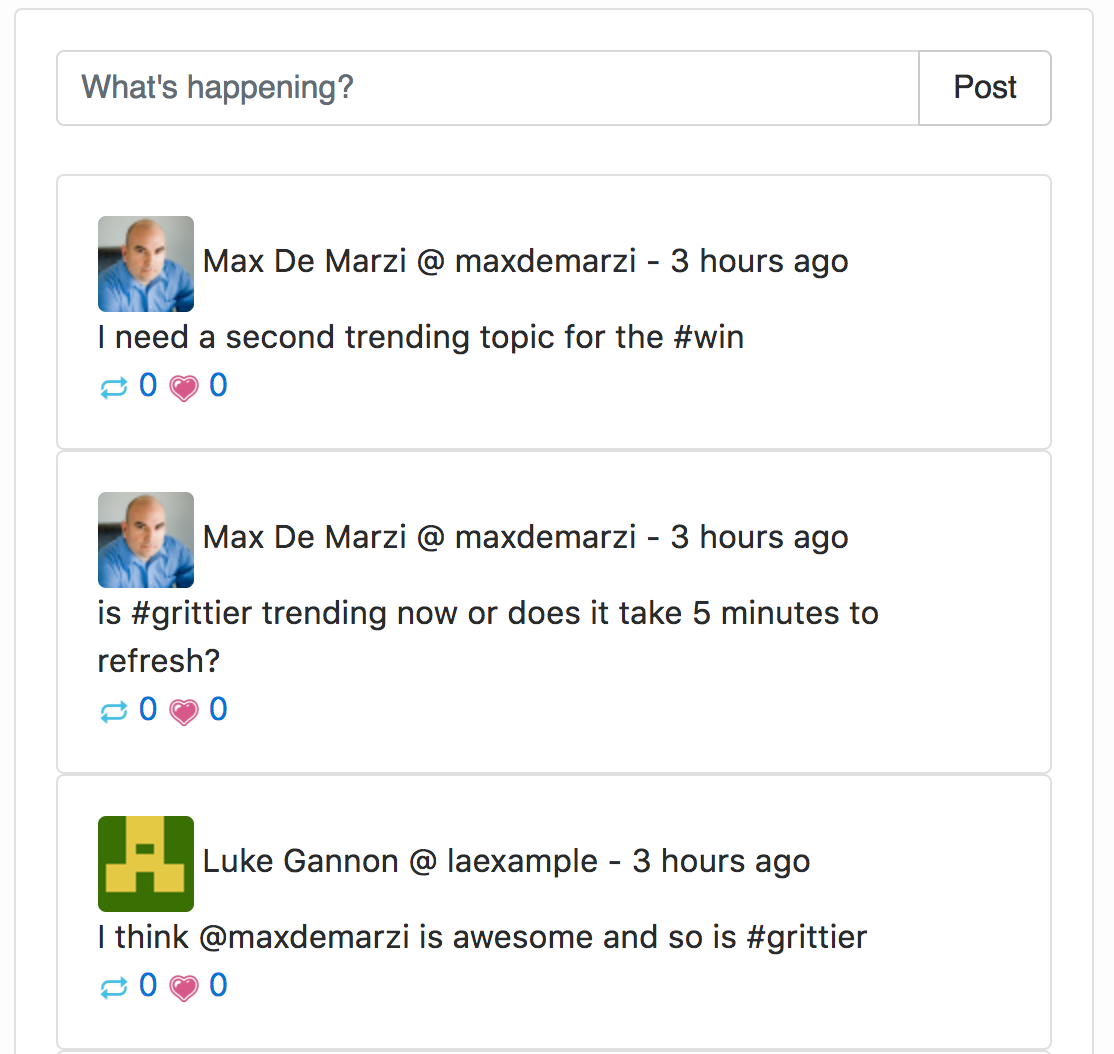
This is the critical part of the home template, shown below:
                            <form id="status" action="/post" method="POST">
                            <div class="input-group card-outline-info">
                                <input name="status" type="text" class="form-control" placeholder="What's happening?" autofocus>
                                <span class="input-group-btn">
                                    <button class="btn btn-secondary" type="submit">Post</button>
                                </span>
                            </div>
                            </form>
                            <br/>
                            @for (it: posts) {
                            <div class="card">
                                <div class="card-block">
                                    <img src="https://www.gravatar.com/avatar/@it.getHash()?s=48&d=retro" class="rounded" />
                                    @it.getName() @@ @it.getUsername() - @it.humanTime()<br>
                                    @it.getStatus()<br>
                                    <span class="post"><a href="/post/@it.getUsername()/@it.getTime()"><img src="/assets/img/1f501.png" height="16" width="16"> @it.getReposts()</a> <a href="/like/@it.getUsername()/@it.getTime()"><img src="/assets/img/1f497.png" height="16" width="16"> @it.getLikes()</a></span>
                                </div>
                            </div>
                            }
To populate the data of these templates, we first start by getting our authenticated user and their profile from our service. Next we fill the timeline with a call to our getTimeline service, and lastly the followers and trending tags.
      get("/home", req -> {
          String id = req.session().get(Auth.ID).value(null);
          User authenticated = getUserProfile(id);

          Response<List<Post>> timelineResponse = service.getTimeline(id).execute();
          List<Post> posts = new ArrayList<>();
          if (timelineResponse.isSuccessful()) {
              posts = timelineResponse.body();
          }

          return views.home.template(authenticated, authenticated, posts,  getUsersToFollow(id), getTags());
      });
I broke out the last two into their own methods, but it is the same concept. Create a Response object, make the call, if it is successful return the results of the call with the populated data.
    private List<User> getUsersToFollow(String id) throws java.io.IOException {
        List<User> recommendations = new ArrayList<>();
        if (id != null) {
            Response<List<User>> recommendationsResponse = service.recommendFollows(id).execute();
            if (recommendationsResponse.isSuccessful()) {
                recommendations = recommendationsResponse.body();
            }
        }
        return recommendations;
    }

    private List<Tag> getTags() throws java.io.IOException {
        List<Tag> trends = new ArrayList<>();
        Response<List<Tag>> trendsResponce = service.getTags().execute();
        if (trendsResponce.isSuccessful()) {
            trends = trendsResponce.body();
        }
        return trends;
    }
Once we put it all together, it really starts to look like Twitter:

The code is still a work in progress, but you can see it on github.

[…] …and it works. We can now register and login with our user. We have wired up our framework and Grittier service, stay tuned for more updates in the near future. On to part 8. […]